Azure Image Builderの自動更新トリガー機能を設定してみる
目次
皆さん、こんにちは。
最近出せていなかったのですが、久々の検証ブログになります。
1月に入り、Azure Image Builderの自動トリガー機能の一般提供が開始されました。今回はAzure Image Builderの自動トリガー機能の概要と、その設定方法についてご紹介したいと思います。
1. Azure Image Builderのトリガー機能とは
そもそも、Azure Image Builderとは何かから解説したいと思います。
Azure Image Builderとは、仮想マシンのカスタムイメージを作成する機能で、作成のプロセスを自動化することから、イメージの作成作業を簡略化してくれるものです。
また、イメージの作成プロセスはコードで書かれているため、既存のスクリプトやツール、コードで管理できるようになりますので、一貫性を保てるようになるのもメリットといえます。
このAzure Image Builderの機能として新たに一般提供が開始されたのが、トリガー機能です。
これまでは、Azure Image Builderで作成されたイメージのメンテンナス(ビルド)は手動で実施するのが基本でした。トリガー機能は手動で実施していたのを自動化するものになります。
現状はAzure Marketplaceから取得したソースイメージが更新された場合にのみ、自動でイメージのビルドを開始してくるトリガーとしてサポートしています。トリガー条件をAuzure Portal画面から設定できないなど、柔軟性はあると言い切れませんが、期待される機能と感じています。
それでは、設定方法について解説していきます。
※今回はMicrosoft Learnの手順をもとに実施していきたいと思います。
2. Azureプロバイダー登録
まずは、プロバイダーの登録から実施していきます。
また、今回の作業は全てAzure Cloud Shellで実行します。ローカルでも操作は可能ではありますが、特別にコマンドをインストールしないといけない等があるので、Cloud Shellで実施することをオススメします。

プロバイダーが登録されているか、コマンドで確認します。
※grepなどを利用するため、Cloud Shellをオススメしています。
|
1 2 3 4 5 6 |
az provider show -n Microsoft.VirtualMachineImages -o json | grep registrationState az provider show -n Microsoft.KeyVault -o json | grep registrationState az provider show -n Microsoft.Compute -o json | grep registrationState az provider show -n Microsoft.Storage -o json | grep registrationState az provider show -n Microsoft.Network -o json | grep registrationState az provider show -n Microsoft.ContainerInstance -o json | grep registrationState |
実行結果としては、「Registerd」もしくは「Not Registerd」が表示されます。
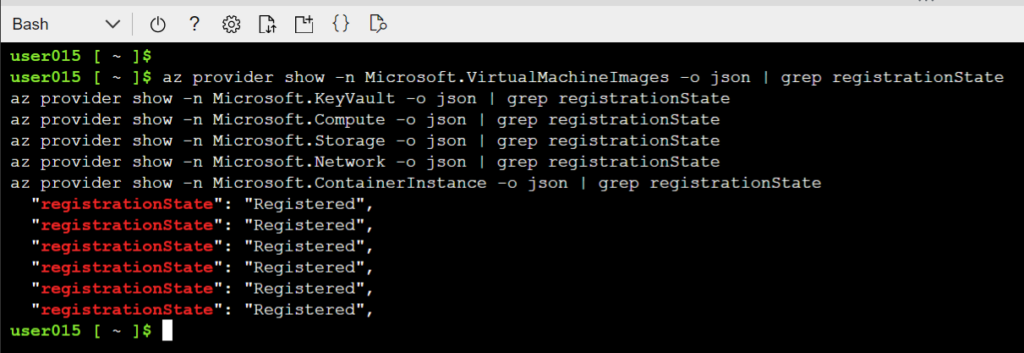
もし、Not Registerdと表示されていれば、下記のコマンドを実行してください。
|
1 2 3 4 5 6 |
az provider register -n Microsoft.VirtualMachineImages az provider register -n Microsoft.Compute az provider register -n Microsoft.KeyVault az provider register -n Microsoft.Storage az provider register -n Microsoft.Network az provider register -n Microsoft.ContainerInstance |
実行が完了したら、また冒頭のコマンドを実行して、Registerdになっているか確認します。
続いて、自動イメージトリガー機能を追加します。
|
1 |
az feature register --namespace Microsoft.VirtualMachineImages --name Triggers |
Registerd、になればプロバイダー登録は全て完了です。
2-1. 番外編
ここで、この先の頻繁に出てくる変数を設定しておきます。
下記のコマンドを実行しましょう。
|
1 2 3 4 5 6 7 8 9 10 11 12 13 14 15 16 17 18 19 20 |
# リソースグループ名 resourceGroupName=rg-NEibTrigger-test # ロケール location=japaneast # イメージのレプリケート先 : ロケール以外の場所を指定 additionalregion=eastus2 # Azure Compute Gallery名 acgName=NEibTriggersGallery # イメージ定義の名前 imageDefName=NEibTriggersImageDef # トリガー名 ibTriggerName=ibTriggerTest # イメージテンプレート名 imageTemplateName=NEibTriggersImageTemplate # イメージのメタデータ用の名前 runOutputName=NEibTriggersTestRun # 作成先のサブスクリプションID - ログイン先が指定される # 複数サブスクリプションがある場合: # az account set –subscription yourIDで設定する subscriptionID=$(az account show --query id --output tsv) |
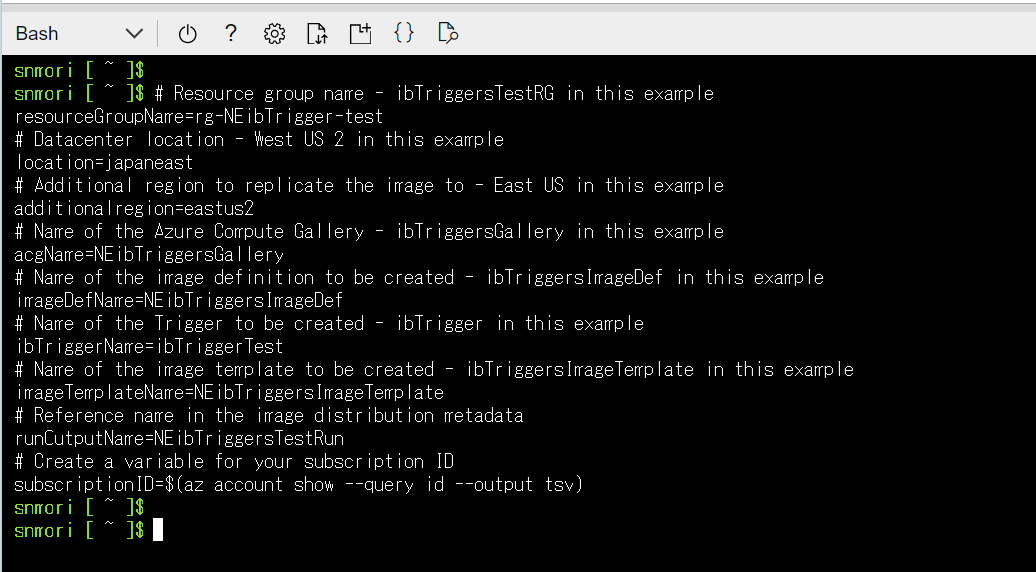
試しに、
|
1 |
$resourceGroupName |
と実行すれば、設定した変数名が画面上に表示されます。
注意点ですが、この設定を完了してからは、Cloud Shellのセッションが切断されないようにしてください。
切断されてしまうことで、これまでの使用してた変数がリセットされてしまうためです。
3. トリガー設定の前準備
ここからは、トリガー設定前の準備を進めます。
やることとしては、
- リソースグループの作成
- マネージドIDの作成、権限付与
を実施します。
その後に、Azure Compute Gallaery、イメージ定義、及びイメージテンプレートを作成します。
3-1. リソースグループの作成
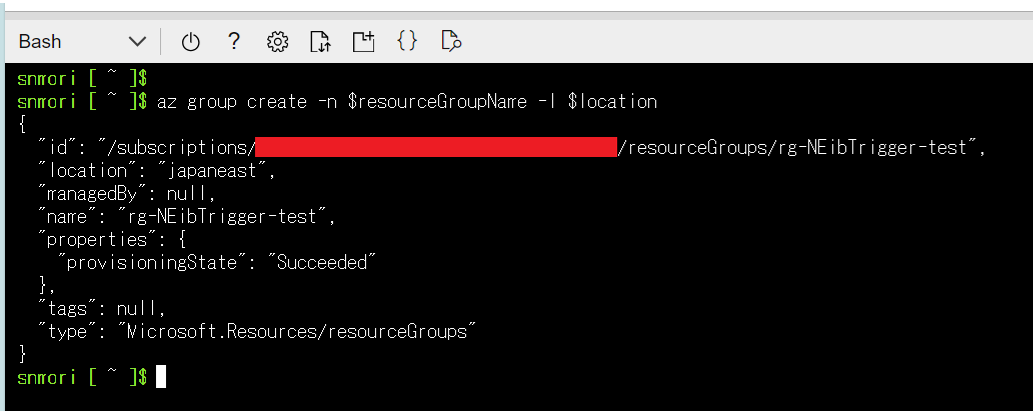
リソースグループはAzure Portalからも可能ですが、せっかくなのでこのままCloud Shellで実施していきましょう。
|
1 |
az group create -n $resourceGroupName -l $location |
改めてですが、変数は先ほどのコマンドで設定済みですので、安心してください。
![]()
登録が完了しました。
3-2. マネージドIDの作成、権限付与
続いて、マネージドIDを作成します。
|
1 2 3 4 5 6 7 8 9 10 11 12 |
# Create user-assigned identity for VM Image Builder to access the storage account where the script is stored identityName=aibBuiUserId$(date +'%s') az identity create -g $resourceGroupName -n $identityName # Get the identity client and principal ID imgBuilderCliId=$(az identity show -g $resourceGroupName -n $identityName --query clientId -o tsv) # Get the user identity URI that's needed for the template imgBuilderId=/subscriptions/$subscriptionID/resourcegroups/$resourceGroupName/providers/Microsoft.ManagedIdentity/userAssignedIdentities/$identityName # Grant "Contributor" access to the user-assigned identity az role assignment create --assignee $imgBuilderCliId --role "Contributor" --scope /subscriptions/$subscriptionID/resourceGroups/$resourceGroupName |
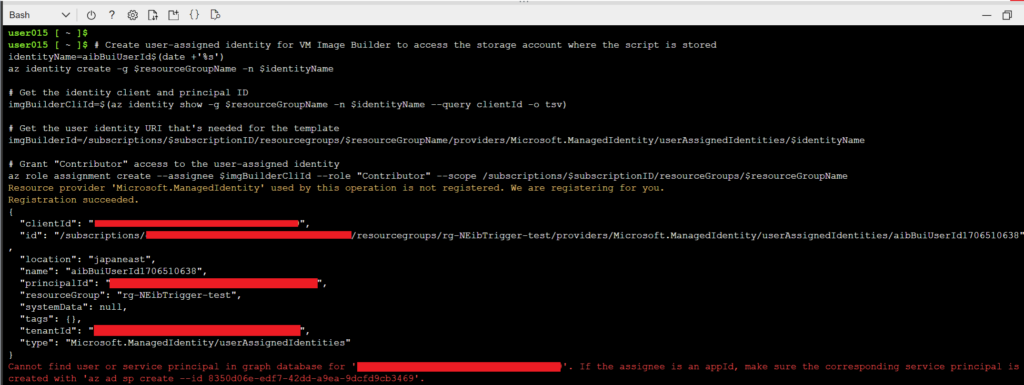
最後のコマンドを実行するタイミングでエラーが出ました。
調査しているとどうやらタイミングの問題という記載があったため、リトライしてみます。(3/3でエラーが出ましたので、恐らく想定していいものだと思われます)
最後のコマンドだけ再実行します。
|
1 2 |
# Grant "Contributor" access to the user-assigned identity az role assignment create --assignee $imgBuilderCliId --role "Contributor" --scope /subscriptions/$subscriptionID/resourceGroups/$resourceGroupName |

上手く登録することができました。画面上からも確認していきます。

これでリソースグループ、マネージドIDの作成、ロール付与まで完了しました。
4. トリガーの設定
トリガーの設定をする前に、元となるAzure Compute Galleryの作成から進めていきましょう。
4-1. Azure Compute Galleryの作成
こちらもコマンドからやっていきます。
|
1 |
az sig create -g $resourceGroupName --gallery-name $acgName |


作成が完了しました。
4-2. イメージ定義の作成
それでは、イメージ定義を作成します。
|
1 |
az sig image-definition create -g $resourceGroupName --gallery-name $acgName --gallery-image-definition $imageDefName --publisher myIbPublisher --offer myOffer --sku 18.04-LTS --os-type Linux |
skuやosのような単語から推察できるかと思いますが、ここで実際のVMのOSなどを定義することになります。

作成が完了しました。
画面上からも確認ができました。

4-3. イメージテンプレートの作成
続いて、イメージテンプレートを作成します。
今回は、Microsoft社員の方が作成しているテンプレートを用いて作成します。
|
1 2 3 4 5 6 7 8 9 |
curl https://raw.githubusercontent.com/Azure/azvmimagebuilder/main/quickquickstarts/9_Setting_up_a_Trigger_with_a_Custom_Linux_Image/helloImageTemplate.json -o helloImageTemplateforTriggers.json sed -i -e "s/<subscriptionID>/$subscriptionID/g" helloImageTemplateforTriggers.json sed -i -e "s/<rgName>/$resourceGroupName/g" helloImageTemplateforTriggers.json sed -i -e "s/<imageDefName>/$imageDefName/g" helloImageTemplateforTriggers.json sed -i -e "s/<acgName>/$acgName/g" helloImageTemplateforTriggers.json sed -i -e "s/<region1>/$location/g" helloImageTemplateforTriggers.json sed -i -e "s/<region2>/$additionalregion/g" helloImageTemplateforTriggers.json sed -i -e "s/<runOutputName>/$runOutputName/g" helloImageTemplateforTriggers.json sed -i -e "s%<imgBuilderId>%$imgBuilderId%g" helloImageTemplateforTriggers.json |

テンプレートを読み込み(Crulコマンド)、冒頭で設定した変数もとに、読み込んだJsonファイルの編集(sedコマンド)をしています。
それでは、編集したテンプレートJsonファイルをもとにAzure Image Builderへテンプレートを作成します。
|
1 |
az image builder create -g $resourceGroupName -n $imageTemplateName --identity --image-template helloImageTemplateforTriggers.json |
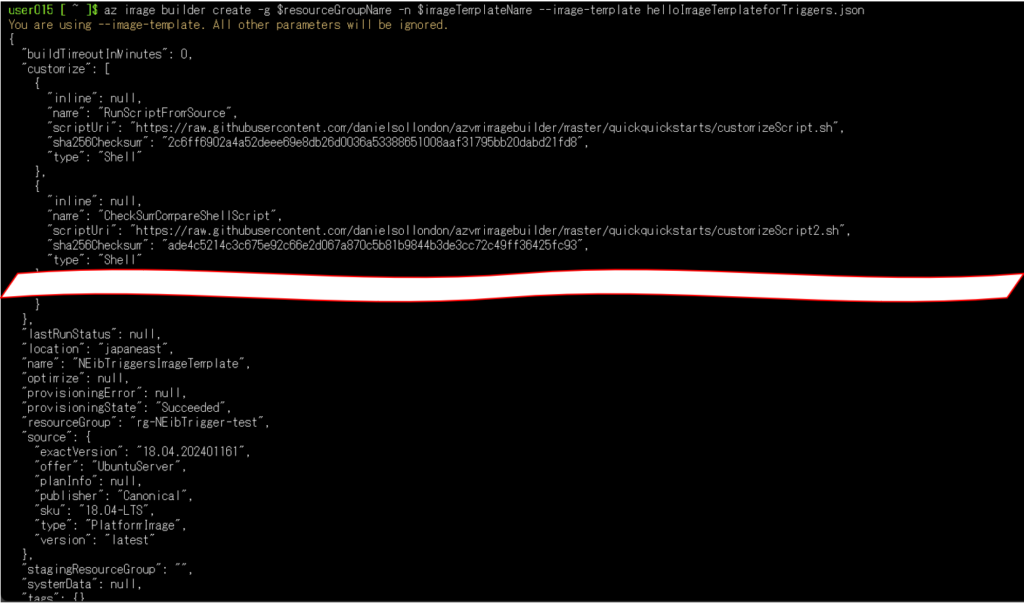
こちらのコマンドを実行することで、正常にテンプレートが作成されているか確認をすることができます。
|
1 |
az image builder show --name $imageTemplateName --resource-group $resourceGroupName |
4.4 トリガーの設定
ここでトリガーを設定します。
こちらもサンプルトリガーをもとに設定します。
|
1 2 |
curl https://raw.githubusercontent.com/kof-f/azvmimagebuilder/main/quickquickstarts/9_Setting_up_a_Trigger_with_a_Custom_Linux_Image/trigger.json -o trigger.json sed -i -e "s/<region1>/$location/g" trigger.json |

画面上からも確認することができました。

また、こちらも下記のコマンドを実行することで、作成されたか確認をすることができます。
|
1 |
az image builder trigger show --name $ibTriggerName --image-template-name $imageTemplateName --resource-group $resourceGroupName |

こちらのテンプレートは、イメージの更新があれば自動的にビルドを開始するような仕組みになっています。
以上で設定は完了です!!
5. まとめ
今回はサンプルを基に作成したため、Ubuntu OSの18.04 LTSと古いOSになっていますが、こちらの手順に沿って、必要に応じJSONテンプレートを作成することで自動化が可能です。
参考にしているGithubページはこちらになりますので、Jsonテンプレートの参考にしてもらえればと思います。
この記事を書いた人
- 森 信之介
- テクニカルマーケターとして、ブログ執筆、セミナー講師を行っております!
この投稿者の最新の記事
- 2024年3月26日ブログWindowsのメモ帳にスペルチェック機能が追加!
- 2024年3月25日ブログBCPの策定や見直しのhow to – ガートナー社が抑えておくべき3のポイントを発表
- 2024年3月22日ブログスポーツにもAIの力を~「TacticAI」が登場
- 2024年3月21日ブログChatGPTやGeminiに並ぶ「Claude3」のプロンプトライブラリをご紹介!